Showing posts with label Mom's Recipes. Show all posts

Tuesday, December 16, 2014

Blueberry Tea

The first time I had Blueberry Tea was pretty much exactly a year ago... give or take two weeks. Haha, really, seriously now - give them back, I could use an extra few weeks. Time goes by too fast as it is :)

Blueberry Tea

So, it was cold (really cold), there was snow everywhere, and we were in a pub in the mountains that didn't feel the need to turn up the heat. All the people in the pub were packed around the tables in front of the fireplace, but any outlying tables were downright breezy, which is where we had to sit. Needless to say a cold and frosty beer just wasn't going to cut it so a friend of mine ordered Blueberry tea.  I held off until the drink came because I don't drink hard alcohol and I don't like tea, but after tasting it, it wasn't all that bad.

It's called Blueberry Tea because the blend of tea and alcohol is supposed to have a subtle blueberry taste to it. That might be true - maybe if I close my eyes and didn't know what I was drinking, but regardless it's a nice 'warm you up' kind of drink.

In perusing my mom's scribblers I came across a recipe for it. Perfect! I had purchased Amaretto for some biscotti I was making and just needed tea and Grand Marnier to make the drink.  I probably wouldn't have purchased the alcohol just for one drink, but it's the Christmas season and it would be nice to have something warm for people to drink.


The recipe is really basic.  I'd have to try the drink with Earl Grey as I've heard it is made with that also. But, I went with Orange Pekoe.

Blueberry Tea
Mom's Scribbler
  • Orange Pekoe Tea, brewed to however strong you like.
  • 1 ounce Amaretto
  • 1 ounce Grand Marnier

Enjoy! And Merry Upcoming Christmas....only 9 more sleeps and 8 more shopping days!

Blueberry Tea

Monday, December 8, 2014

Thimble cookies

I don't know where the time goes, but it goes by pretty darn fast. One day I'm thinking it's Monday...I have the whole week ahead of me and in a blink it's Thursday and I haven't done half of what I want to and even less of what I need to do before Friday because Saturdays are ME days and laundry and all other things wait!  I wish days were longer....yup even Mondays :)


Being all belated on this post, I figure I'd at least explain what has sucked up some of my attention -  besides re-watching Torchwood, that is. I spent some time crocheting a couple headbands, a doggie jacket for my mom's dog, Chico - who is the sweetest little guy, and an owl hat.  I like doing other things while watching tv, it's like it doesn't count if I'm doing stuff since I have something to show for it at the end.

crocheted owl beanie

But on to the cookies - which I forgot to take a picture of when they were completely finished and I had drizzled with melted white chocolate. Sorry!

When I was here, visiting my mom a year ago, I wrote down her recipe for Thimble cookies. Since I had some homemade Blueberry-Cherry jam that I made this summer, I figured I'd put it to good use.  The cookies taste really good and they are easy to make, but I think the recipe is off somewhat in that it seems like the baking time is way too long and the dough isn't firm enough to hold up to longer baking times with the lower cooking temperature - they spread way to much - I even left the rolled dough balls in the fridge to firm up.

Thimble cookie dough balls
I'm going to skip all the gather ingredients and mix up the cookie pictures. The recipe is pretty simple to follow along.  So....wow, that sure made the mixing the dough steps go by quick! ;)

Once you have your dough all nicely mixed up, roll the dough into balls. Mine were 1 level tablespoon.  It's just easier to have them ready.

Gather up some coconut and/or crushed almonds, and beat the egg white. hahah, that was one bad egg!

Thimble cookie prep

Now, I can tell you this and I'm sure for a billion people this is simple, but my brain does not like to play nice with my hands.  The simple basic idea is one wet hand - one dry hand.

Thimble cookie egg bath

With one hand (the wet) you drop the dough into the egg white and then ONTO the coconut or almonds.

Thimble cookie crushed almond

With the other hand (dry hand) you roll the cookies in the coconut or almonds and then put them on the cookie sheet.

See those cookies...yup, that dozen right below...I had to wash my hands 6 times...SIX TIMES so I wouldn't get coconut or almonds in the egg white. Every second freakin cookie I used the wet hand in the dry ingredients or dry in the wet.  Even telling myself 'pay attention' I couldn't do it!

My brain is not connected to my hands!

Thimble cookies ready to indent

I did get them done, as you can see, and then decided I needed therapy to get over my obsessiveness with having coconut or almonds in the egg whites :)

Thimble cookies - indent with extract lid

The first batch I made, I used the top of an extract bottle to make the indent and then following the recipe, I baked the cookies for 15 minutes, pulled them out of the oven to indent again...and I was disappointed :(   The cookies spread - a lot.

I used two spoons and mooshed them back in to shape. Yup, it's a technical cooking term..I've used it before, so it makes it real :)  Indented again, and baked for another 10 minutes...watching them spread the entire time. *sigh* I removed them from the oven and filled them with jam.

It was NOT the picture perfect cute rounded jam filled little cookies I've seen before.  *another sigh*

The second batch had longer fridge time before putting in the oven. For this dozen I used a teaspoon for the indent - definitely my favorite of the two methods.

Thimble cookies - indent with teaspoon

Again, I baked them for 15 minutes, pulled them from the oven,  mooshed them back together and indented again, where needed ..but this time I put the jam in so that it would bake too..and a white chocolate chip. I prefer doing it this way too. The jam thickens a bit and makes it easier for storing.

Thimble cookies mooshed back in to shape

I shortened the cooking time of the second baking bit for this batch. 15 minutes is way too long and I'd probably even say 10 minutes is too much also.

Pulled from the oven, I mooshed them together again.   Sorry, this is where the cookie pictures end...so..here are some lights on my tree - with my favorite heart ornament :)

Merry Christmas

Once the cookies cooled, I drizzled white chocolate over the tops. Yum.  Although I think they were a bit over baked, they were good. They had a bit of a crunch to them with a softer inside.

I would make these again and play around a bit more with the temperature and baking times. I don't think any 'mistakes' would make terrible tasting cookies.


Moms Thimble Cookies
As written

INGREDIENTS
  • 1/2 cup butter
  • 1/2 cup brown sugar
  • 1 egg yolk
  • 1 egg white
  • 1 cup flour
  • 1/8 tsp salt
  • 1/2 tsp baking powder
  • 2/3 cup of coconut or almonds (finely chopped)
  • Jam
DIRECTIONS
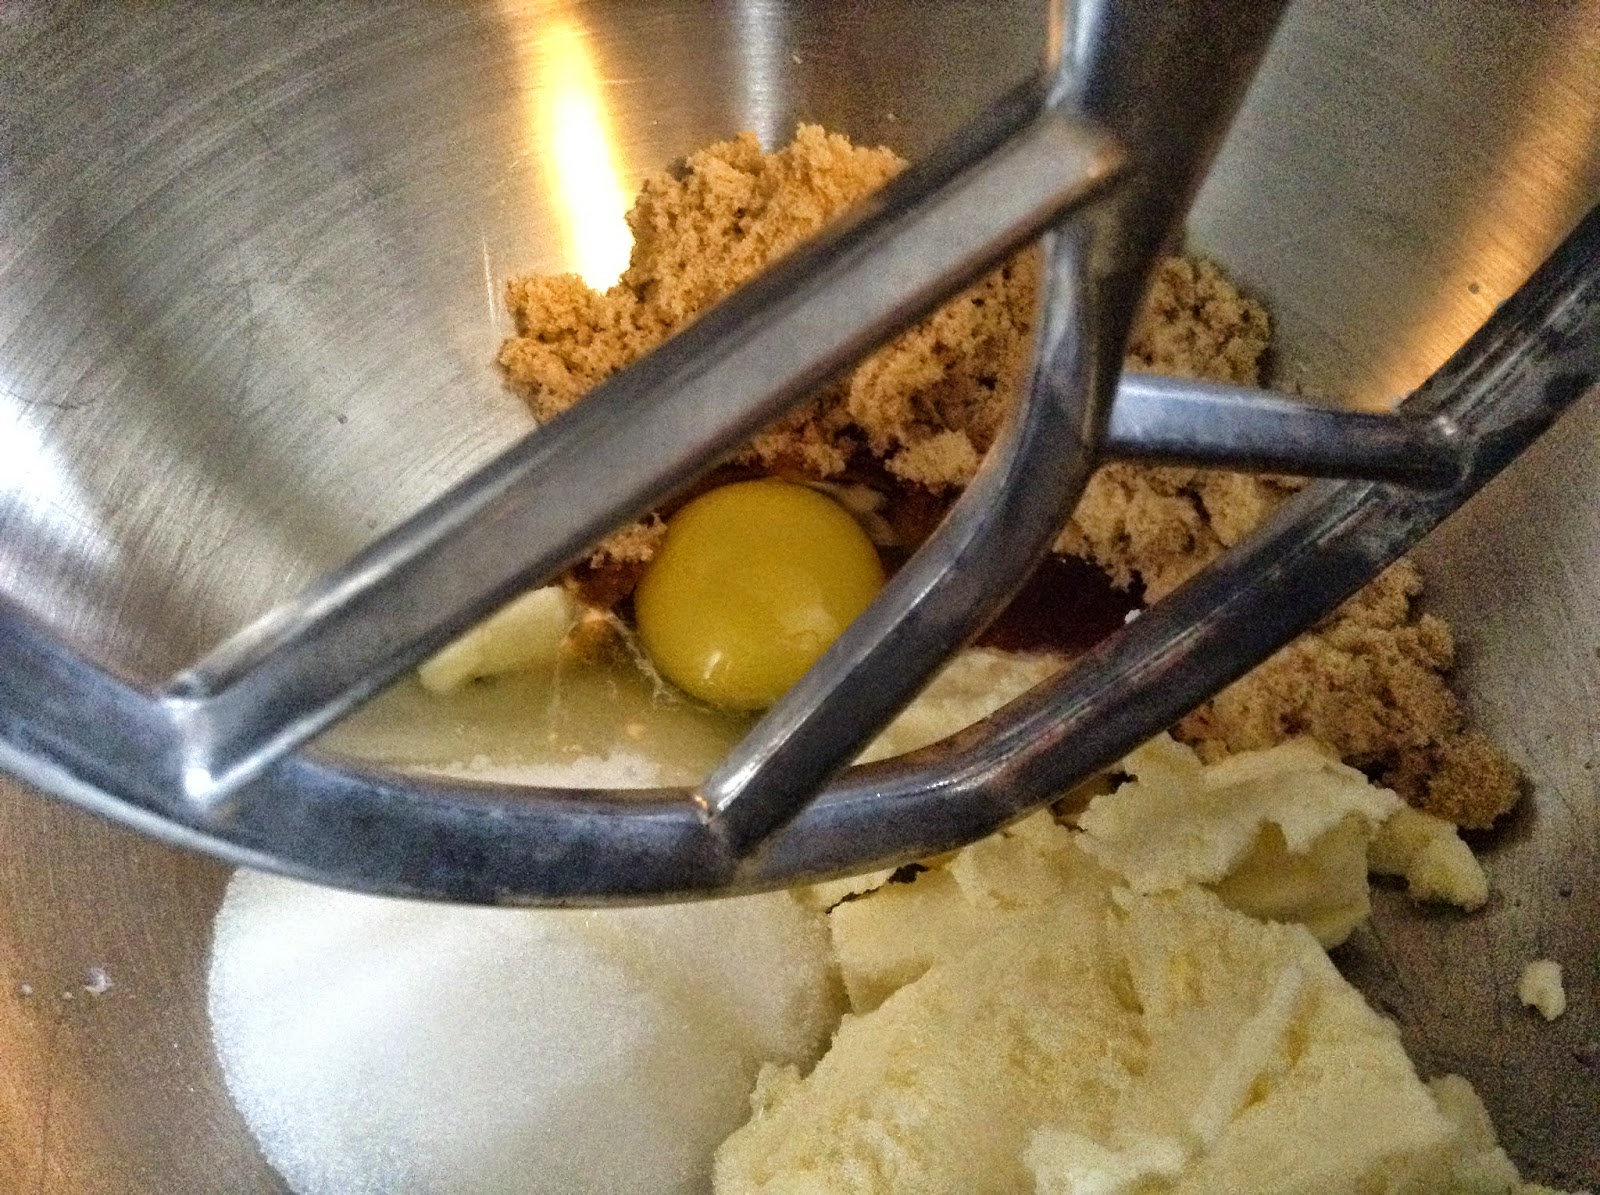
  1. Cream butter and sugar together
  2. Beat in egg yolk
  3. Stir in rest of ingredients and mix well.
  4. Shape into balls
  5. Make indent with thimble
  6. Dip in egg white and roll in the coconut or nuts
  7. Bake 325 F for 15 minutes
  8. Indent again
  9. Bake 10 - 15 mins more
  10. Fill with Jam
  11. Let cool


Friday, November 28, 2014

Chicken and Broccoli Impossible Pie

I have a hard time with making non baked goods. It's not that I don't want to make other items, it's just that I rarely eat meat or packaged food, nor do I want to store/freeze extra food each time I want to test out a recipe in a cookbook - baked goods are easy to pawn of.

Impossibly, I pawned this Pie off on my mom for her dinner tonight. :)

Chicken & Broccoli Impossible Pie

Most of the things I eat are made from scratch, if possible, although I do admit to eating a lot of packaged soup lately... Campbell's Everyday Gourmet Tomato Basil is my newest favourite soup. It comes in a box and is just yummy.

The Chicken and Broccoli Impossible Pie is a handwritten recipe my mom wrote in the back of a cookbook. I don't know where she got it from originally, but it could be from the back of the Bisquick box. They have a similar recipe on the back of the box but the ingredients amounts are a bit different, so perhaps they have revised it since my mom copied it out.

The ingredients are pretty basic and easy to put together. I HATE onions, just really hate them more that I can even write about, so I traded them out for mushrooms. Hahaha, which I also hate, but not as much as the dreaded onion :) I also chose to use fresh broccoli instead of frozen. I weighed it and 300g is about 4 cups of fresh chopped.


Mix the chicken, broccoli, mushrooms (or dreaded onions), and 2 cups of the cheese together in a pie plate. It should be a deeper dish pie plate and not a low sided thing.


Mix the mix, eggs, salt, pepper, and Bisquick together and pour over the chicken and broccoli.


Bake for 30 - 40 minutes until a knife inserted into the pie comes out clean.


Top with the remaining 1 cup of cheese and bake for another 1 - 2 minutes. 


There you go. Impossible to believe that I will never make this again, I know :) But it's really not my kind of food. It really needs something to kick up the flavour besides the salt and pepper. Maybe some fresh herbs. It's not horrible, but I found it a bit bland.

Chicken & Broccoli Impossible Pie

INGREDIENTS
  • 300 g package frozen chopped broccoli
  • 3 cups grated cheddar cheese, divided
  • 1 1/2 cup cooked chicken
  • 2/3 cup chopped onions
  • 1 1/3 cup milk
  • 3 eggs
  • 3/4 cup Bisquick mix
  • 3/4 tsp salt
  • 1/4 tsp pepper

DIRECTIONS
  1. Heat oven to 400 F
  2. Grease pie plate
  3. Mix broccoli, 2 cups of cheese, chicken, and onions in the pie plate'
  4. Blend eggs, milk, bisquick, salt, and pepper together until smooth.
  5. Pour into pie plate.
  6. Bake until knife comes clean 30 - 40 mins.
  7. Top with remaining cheese.
  8. Bake until cheese is melted 1 - 2 minutes longer.

Thursday, October 9, 2014

Cranberry Tarts for Thanksgiving

This weekend is Thanksgiving in Canada. Mmmmm Turkey, stuffing, veggies and homemade cranberry sauce...and of course dessert. I'm not overly excited for pumpkin pie, so I decided to make something that still would blend in nicely with the holiday.

Cranberry Tart with Heart cutout

My mom and aunt made tarts when my aunt was here visiting this summer and my mom talks about them quite often. They used a recipe for Cranberry Meringue Pie from the Culinary Arts Institute Encyclopedic cookbook, but without the Meringue. Right next to that recipe is a similar recipe for Cranberry Pie, so I'm not sure why they didn't use that one instead. I'll have to ask when I'm over there on Sunday.

Cranberry Heart Tart

I cheated a wee bit and used pre-made pastry shells for the base and used extra shells to make the pastry decorations. I think it would of been easier to get the dough out of the shell when they were frozen...it's way too soft and fragile trying to get it out in a less than frozen state. Just sayin'.

It's a pretty easy recipe to follow but it takes a little bit of time to wait for all the cranberries to pop and also for the final cooking part. Just a wee bit of standing around.

I doubled the recipe, which made about 60 tarts. The recipe (as it's written below) says it makes 1 9" pie, so I wasn't sure what that equaled out to in tarts, so to be safe I doubled it. More to share!

Cranberries

After dissolving the sugar in 1.5 cups of the water, I added in the cranberries and let it cook down for a while on medium heat. A bit more than a simmer, but not a boil, so I could walk away from the stove without things burning.  I could hear the cranberries popping!


After cooking so that most of the cranberries had burst, I tempered the egg, butter, water, salt, cornstarch mixture with some of the hot cranberry mix, and then while stirring the cranberries on the stove, I slowly poured the tempered egg mix in. Please don't scramble the eggs...please don't scramble the eggs...please don't scramble the eggs...hahah, that was what I was thinking in my head. It was scary to think it all could go wrong in an instant.

Phew!

At this point you let it cook until it turns clear and thickens up. I had the stove on medium-low (closer to medium) and it was taking quite a while to clear up, but it was getting less cloudy and thick. After about 20 minutes I had enough and to me it looked great..and goopy!

Cranberry filling cooking

I put the cranberry filling in the tart shells using a soup spoon. Yes, I know, I need to learn to do this more neatly...or you might be nice and think that the below picture isn't too bad, but well...this was the cleanest looking set of tarts I had :)

Cranberry Tarts filled with goodness

I added on cutouts of acorns, hearts, and baby hearts.  Wala! Off to the oven.

Cranberry Tarts with acorn cutouts

I poked little holes in the tops of the acorns to give them a more acorny look. My sis thought it was cute :)  I'm not sure how people make nice clean looking tarts that don't bubble up and over. These ones weren't overly full and they sank down quite a bit once I brought them out of the oven. Guess I'll have to google that..

Cranberry Tarts out of the oven

But messy or not, they are yummy. They are sweet and tart...and sticky! Sure, it's sad when a few tarts stick together, but there is a way to fix it...put them in your belly so no one sees them!

Cranberry Tarts
Culinary Arts Institute Encyclopedic Cookbook - 1950 (pg 572)

Cranberry Tarts for Thanksgiving

INGREDIENTS
  • 2 cups sugar
  • 1 cup water
  • 4 cups cranberries
  • 2 Tbsp cornstarch
  • 1/4 tsp salt
  • 3 Tbsp butter, melted
  • 2 egg yolks, beaten


DIRECTIONS
  1. Cook sugar and 3/4 cup water until sugar is dissolved.
  2. Add cranberries and cook until they stop popping.
  3. Combine cornstarch, remaining water, salt, butter, and egg yolks and add a small amount of cranberries. 
  4. Mix thoroughly, add to remaining cranberries and cook until thickened and clear. 
  5. Pour into pastry shell, cover with meringue and proceed as directed.

Or in my case, pour into a bunch of tart shells.

The recipe for butter pecan tarts says to bake at 325 F for 20 - 25 minute, so that's what I did. 

Thursday, September 25, 2014

Moms Swirl Squares

I'm not sure if I've ever had these before, I mean I think I have, but I don't think I've had this particular recipe or even had Swirl Squares that my mom might have made, but... she has it handwritten down in her scribbler, so it was worth trying :)

Swirl Square

Going in to making these, I had no clue what they would turn out like. But after seeing them out of the oven, these are chocolate chip cookies baked in a pan ...and a lot easier to make!

I added a 1/2 cup white sugar, 1/2 cup brown sugar, 1 egg, 1/2 tsp vanilla, and 1/2 cup of butter to the mixer and let it go while I got the flour, baking soda, and salt ready.


Once the sugar, butter, and egg mixture was mixed well, I stirred in the flour mixture and then the nuts. I was expecting a batter, but it was really thick. I was really thinking I did something wrong. I checked online for other recipes to see if I was missing a liquid, but I wasn't.  So don't be surprised when it's like a cookie dough!


I pressed it down in to a greased baking pan and dropped the square baking chunks that I had leftover on to the top.  The recipe says to bake for 1 -2 minutes to melt them, but I went for 4 minutes before taking them out of the oven.


Even at 4 minutes they weren't completely melted, but I did my swirling with the knife anyways. I have to say I was a bit concerned with the thickness of the dough and swirling the chocolate through it. I really felt like it would stay all mangled looking and not soften or even out!


I was happy when it came out of the oven looking half decent! But would it be dry and crunchy like toast or grainy or or or... my experience with marbled or swirled desserts has been mostly limited to cake or cheesecake, so it was a pleasant surprise to find out it was basically a giant square cookie.


I had frozen the leftover Nutella Frosting that I used on the Fudge Four O'Clocks, so after a bit of defrosting, I used it on the Swirl Squares.  YUM!

Notes on the recipe:

My mom's recipe has a bit of a glitch in it. She's got an additional measure that isn't tied to anything.

3/4 cup   1/2 cup brown sugar 1/2 cup white sugar

But, it seems like her recipe is half of a Five Roses recipe, somewhat. The Five roses calls for 1 cup brown sugar CHECK! 1/2 cup of white sugar...WAIT! That doesn't add up, but if I cut it in half it's 1/4 cup and if I add it to the half of brown sugar then it equals the 3/4 cup...hrmm..what to do?... I really do think this is the Five Roses recipe from online.

I decided on the 1/2 cup brown and 1/2 cup white. It doesn't seem overly sweet to me, but try it out for yourself :)

Swirl Squares
The recipe and instructions are how she wrote it out.
 
INGREDIENTS
  • 1/2 cup margarine
  • 3/4 cup   1/2 cup brown sugar 1/2 cup white sugar
  • 1/2 tsp vanilla
  • 1 egg
  • 1 1/8 cup flour
  • 1/2 tsp baking soda
  • 1/2 tsp salt
  • 1/2 cup chopped walnuts
  • 1 cup semi-sweet chocolate chips

DIRECTIONS
  1. In a large bowl measure butter, sugar, vanilla, and egg. 
  2. Beat until blended
  3. Stir in flour, soda, salt, and nuts
  4. Spread in a 9X9 inch greased pan
  5. Sprinkle chocolate chips evenly over the top
  6. Bake 375 F for 1 - 2 minutes until chocolate chips are soft enough to marble.
  7. Run knife through batter
  8. Bake 20 minutes more.


Wednesday, July 9, 2014

Mom's Jelly Roll


I wanted to make a Jelly Roll or something since I have a bunch of homemade blueberry and raspberry jam sitting around, and since I haven't made any of my moms recipes, I figured this would be a good recipe to test out since I knew she had one written down.

This recipe comes from the little blue exercise book.

I wasn't sure I would be able to make it since it's really hard to decipher, but I worked it out. Well, I think I did :)

I wrote out everything I could understand, checked which ingredients were in the instructions and vice versa and then put it all together.  The only ingredient I'm unsure of is the lemon zest...or whatever it is, because I can't find it in the instructions and there is no mention of some other ingredient that I am missing from the list.  Also, for the second sugar on the list, I'm guessing icing sugar to decorate the top with, although I have seen some jelly roll recipes where they sprinkle it over the jam before rolling also.

What I love about this, is that my mom tried to figure it out again too! She copied over some of the faded writing, but then left off.


So, off to the market for the ingredients...a stick of butter, a container of milk, a loaf of bread... for those of you who remember sesame street.
Once all the ingredients are collected. Mix all the dry ingredients together. I added the lemon zest to the flour, stirred it all up to combine and let it sit while I moved on to the eggs.

Separate the 3 eggs - whites and yolks.  Beat the egg whites until stiff and then fold in 1/2 cup of sugar.

Mix the yolks and cold water together and then add in 14 cup of sugar and mix until foamy.

Fold the yolk mix in to the whites

Once that's all done, gently fold in the flour.  On a greased pan with a greased parchment - spread out the batter. It's bubbly feeling and looking, very much like pancake batter. At first I thought it wouldn't spread, but it puffs up and fills in the thinner spots.  It still needs to be spread evenly or it will get crispy in spots when it cooks.

My mom's instructions don't give any information on what to do once cooked and there were two different trains of thought in other recipes I looked at.  I chose option 1 listed below, but I think option 2 would of worked just as well... since I was only using jam. If I was using whipped cream or something that would melt, then option 1 for sure.
  1. Once out of the oven, cut off crispy edges and then roll in a clean towel until cooled. Once cooled, unroll, and spread with jam
  2. Once out of the oven, cut off crispy edges, spread with jam, and then roll while still warm.

Having chosen option 1, once it cooled, I unrolled it and spread with blueberry jam.

Roll up lengthwise, placing open edge down and garnish.

All that's left is to bring the Jelly Roll to mom.


Mom's Jelly Roll
The recipe and instructions are how she wrote it out.

INGREDIENTS
  • 3/4 cup flour
  • 1 tsp baking powder
  • 1/4 tsp salt
  • 3 egg whites
  • 3/4 cup sugar
  • 3 egg yolks
  • 2 tbsp cold water
  • 1/2 tsp lemon zest*
  • sugar*
  • 3/4 cup jelly

DIRECTIONS
  1. Sift together flour, b.powder, and salt
  2. Beat egg whites until stiff. Gradually fold in 1/2 cup sugar.
  3. Mix egg yolks with water. Add in 1/4 cup sugar and beat until foamy.
  4. Fold egg yolk mix into egg white.
  5. Fold in flour mix.
  6. Bake 25 minutes @ 350 F